Wednesday, January 23, 2013

Project Life - Week 2

Week 2 is done! It took me less time than week 1, so I am hopeful that it will get easier when I will have an established process. My Seafoam kit arrived in the middle of the week and I swapped the printed cards that I planned to use for the premade cards from the kit.

Here is how it looks with all inserts.


Left page. I used letter stickers on the two bottom pictures and journaled right on the top picture. I like the look of the handwriting on the pictures when somebody else is doing it. I am not sure about mine. I didn't decide yet if I will continue to do that or not.


Title card. Similar to last week.


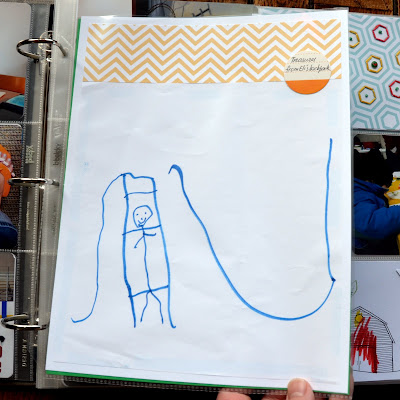
Insert one. I used a regular 8.5x11 page protector from an office supply store. I trimmed Eli's artwork to fit into page protector and added a stripe of Seafoam patterned paper from the digital edition that I printed at home.


Insert one (back) on the left and insert two (Design H) on the right. Ella had her first gymnastics meet on Saturday. I slipped the invitation into the page protector on the left and added two pictures from the meet and a journaling card.


I used Fiskars punch to make the folded file tab and embellished it with small flower sticker.


Insert two (back) and right page. The back of insert two has 3 pictures I took while we were waiting for the food at the restaurant. First they all played our favorite game "Mama, papa, zhaba, zap" and than the girls taught Ofir to play "chopsticks". On Sunday we went to Wisconsin Quilt and Fiber Arts museum. I saved Eli's art work that he made there, trimmed it to 4" and split between two pockets. The arrow "this" (cut out from seafoam journaling card) is pointing from the picture to the artwork.


I used one filler card this week. To spice it up I added hand stitching to the hexagons in yellow and red with green french knots in the center.
 

I am linking up with Project Life Tuesday over at the Mom Creative.

Project Life is a memory keeping system designed by Becky Higgins.

Friday, January 18, 2013

We R Memory Keepers - Winter Frost


Today I am a guest designer for We R Memory Keepers. I got to work with beautiful Winter Frost line. I loved the soft colors of the papers, beautiful embossed stickers and the fabric buttons. (The buttons reminded me the fabric buttons that were on duvet covers when I was a child.)  The most unique thing about this winter line is that is has both snowflakes and flowers. That made this collection a perfect choice to scrapbook the pictures from our unusual March this year - from snowfalls to blooming flowers in three weeks.

Supplies: patterned paper, stickers, buttons (WRMK ), glitter glaze (Li'l Davis), stickles, liquid pearls (Ranger), pearls (Want2Scrap), Silhouette Cameo

I started by layering the big diecut paper on top of the green polka dot paper. I cut out three paper borders and layered them on top of each other with dimensional adhesive.  The stripped border is covered with a thin layer of glitter glaze that adds a light sparkle. I added my pictures and the title that was designed in Silhouette Studio and cut with Silhouette Cameo.


I added snowflake stickers on the left of the snow picture and flower stickers on the right of the flower picture. Can it be more perfect?


I finished the layout with a journaling tag and few buttons.  To add just a little more interest I took Liquid Pearls in white opal and went over the scallops in the patterned paper and the dots in the green polka dot paper. The last addition was s touch of Stickles in lime green to the scalloped border under the pictures.

I still had some leftover papers and stickers so I made another winter layout. This time I used two pictures of my two younger kids snuggling on the couch. I used the Bazzill scalloped cardstock as a base, a big square of Winter Frost paper under the pictures, a journaling card and "Winter" sticker from the embossed sticker sheet. I added American Crafts thickers to complete the title.

Supplies: cardstock (Bazzill Basics), patterned paper, stickers (WRMK), glimmer mist (Tattered Angels), thickers (American Crafts), liquid pearls (Ranger)


The embellishment cluster was built with a combination of stickers and fussy cutting. I added Liquid Pearls in silver pearl to the flowers.

Here is the last layout I made. This one is super simple. One big cluster of tags, border stickers and frames.

Supplies: patterned paper, stickers, frame, button (WRMK), ink (Clearsnap), smooch ink (Clearsnap), liquid pearls (Ranger), pearls (Want2Scrap), jute (Close To My Heart)

I inked the edges of the tags with blue ink to go with Eli's blue collar. I added Liquid Pearls to the border stickers and tiny pearls to the snowflake.

Three layout. Not bad since I only had 5 sheets of patterned paper. But what should I do with  the beautiful scraps? Hmmm... How about a card?

Supplies: patterned paper, stickers (WRMK), snowflakes (Cloud 9)

Two cute penguins saying Hello.


Maybe a tag? Why not? 

Supplies: patterned paper, stickers (WRMK), letter stickers (Simple Stories), snowflakes (Cloud 9), glitter glaze (Li'l Davis), twine

That was fun! I gathered all small paper scraps and layered them on top of a shipping tag. I trimmed the edges, added letter stickers and covered everything with a layer of glaze. After the  tag was dry I added a snowman sticker and few snowflakes from my stash.


That's all. I hope you are still with me. Thank you We R Memory Keepers  for inviting me to be a guest designer! I really enjoyed working with this line!

Tuesday, January 15, 2013

Project Life - Week 1

Here it is. My first Project Life spread.
I have to admit it took me forever. The first page of an album always takes me very long time because I am trying to make design decisions for the whole album - titles, types of embellishments, so on.  I think I am happy how it turned out but I give myself a permission to go back later and maybe add few small embellishments here or there.


As I said before I am using the Seafoam core kit. The cards on this page are from the digital edition. the paper kit should be here tomorrow! 

For my title I cut the word January with the Silhouette and added numbers from the Lilly Bee sticker sheet.  I finished with a piece of washi tape and American Crafts glitter tape. I will continue to use similar design through the album. I added the picture of the "laps to miles" chart at the Pettit where I walked on Thursday during Lila's ice skating practice. I saved the wristband and added it as well.


The right page is very simple. A lot of journaling, picture of Lila doing her homework, picture from the baby shower I attended on Saturday and three pictures from the fundraiser event at the pizzeria. After helping at the restaurant me and Lila had pizza and also bought some frozen pizza and soups home. I glued the receipt to one of the journaling cards, trimmed and added to the page protector pocket.


I decided to do a little hand stitching. I rummaged through my extra diecuts box and found this heart. I adhered it to the center of the 3x4 card and stitched around the edges with red embroidery floss. I will continue to do that through the album, probably not on every page.


I saw this quote on Elise's blog. I really liked it and wanted to use it in my first spread. I made a 4x6 card in Silhouette Studio, cut it, trimmed 1" on the left and adhered it to one of the 4x6 cards from the kit layering different colors of cardstock under the top layer. I saved the cut file and you can download it here.

I wanted to include a calendar but couldn't find one that I life and that goes from Monday to Sunday. I didn't want to spend too much time searching or designing it myself so I let it go. I also did not include the week number. Still thinking about it.

Now on to the week 2!

I am linking up with Project Life Tuesday over at the Mom Creative.

Project Life is a memory keeping system designed by Becky Higgins.
Posted by Picasa

Wednesday, January 9, 2013

Samantha Walker Creative Crafters Team January Blog Hop

Welcome to the Samantha Walker Creative Crafters Team Blog Hop! This month's theme is Winter.
You should have arrived here from Aimee's blog!...

If this is your first stop, be sure to head over to Samantha Walker's blog to start at the beginning!


This month one lucky winner will receive the fabulous


AND be sure to look extra closely at Step #4 to learn how you can get this FREE SVG and Silhouette Studio file:

To enter, just leave a comment on Samantha's blog during January 9th through January 13th. The winner will be announced on Samantha's Facebook page on Monday, January 14th. 

For additional entries:
1. Receive an additional entry for commenting on each of the other blogs in the blog hop.

2. Go here and follow Samantha Walker's blog 

3. Follow her on Facebook

4. Sign up for an e-mail subscription to Samantha's blog and you will automatically receive a link to a free SVG cutting file that you can download and use on your personal electronic cutter. If you are already a subscriber, just enter in your information in the secure form on Samantha's blog!  The free files will be e-mailed early next week!

To receive the additional entries and get the free files, mention in your comment on Samantha's blog that you have done so! 

Now, after we are done will all formalities, take a look at my project. I have a soft spot for small cute boxes, containers, bags, ... you got the idea. When I saw this adorable Samantha Walker Bag Carton Box I knew I have to make it. With snow in my backyard and winter on my mind, I decided to add a little sparkle to the bags by adding glittery snowflakes. The bags are 3" x 4.5" - perfect size to be filled with few yummy treats and shared with friends.

I plan to fill mine with small chocolates and take them with me to the crop on Friday to share with  my crop buddies. 


Let me show you how I made them.
I cut out the Bag Carton Box from a 12x12 sheet of kraft cardstock. I folded and creased all folds at perforated lines. The diagonal folds should be in the opposite direction that all other folds. These are the sides of the bag.


Next I opened the snowflake cut file and 12 piece tag set in the Silhouette Studio and deleted everything except one snowflake and  one label. I also deleted the ribbon slots from the label since I didn't plan to use them. I resized the snowflake to be 2.845" wide and the label to be 2.5" wide and cut them out from the double-sided adhesive sheet. I removed the yellow liner and adhered the snowflake and the label to the outside of the box. (Pick-Me-Up tool comes in handy for poking out all stubborn tiny pieces of the snowflake)


I removed the white liner and added Silhouette Glitter. After brushing off the extra glitter I added a piece of adhesive tape to the side flap of the box and assembled the box. 


I finished my first treat bag with glitter letters and a pearl. 


To make the lace label, I used the inner oval of the label shape.  I peeled of the yellow liner and covered one side of the adhesive sheet with lace. I carefully trimmed around the edges, peeled the white liner and added the oval to the bag.


View form the back.

Filled with chocolates and ready to be shared.

Thanks so much for stopping by!  I hope you were inspired to try these or any other beautiful cut files from Samantha Walker Silhouette Store.
Click on the image below to head over to Carolyn King!

Tuesday, January 1, 2013

Scrap It Girl January challenge - Bling, Glitter, Sparkles or anything SHINY


Welcome 2013! New plans, new hopes, new beginnings, new challenges!

At Scrap It Girl we open the new year with sparkles! This month challenge is to use bling, glitter, sparkles or anything shiny. How fun is that?? 
When I started to think about the challenge I was in the midst's of working on several card sets. It happened that I was using the Glitter Cardstock Matstack by DCVW. It has a beautiful, shiny and sparkly texture but there is no glitter that dulls your blade and gets into everything. Perfect!

I started with butterfly cards using the negative diecut. I was inspired by this Pinterest find. I designed the squares with the butterfly and pierced border in Silhouette Studio and cut them all together. The butterfly square is mounted on top of the glittery square using dimensional adhesive. I finished some of the cards with stamped sentiment and some with a glittery button.

Supplies: cardstock (glitter - DCVW, white - American Crafts), Silhouette Cameo, stamp (See-D's), buttons (American Crafts)


After making several of this cards sets I was left with lots of butterflies and long glittery scraps.  I couldn't let them go to waste so here is design number two. One simple pennant with white butterfly.

Supplies:  cardstock (glitter - DCVW, white - American Crafts), Silhouette Cameo, stamp (Close To My Heart), jewels (Recollections, Marcella by K)

I stamped the sentiment under the pennant and added one jewel in coordinating color.

Here is another set - here I just added glittery punched border. I made this card set for a friend that just had a baby. The papers are from an old Heidi Grace collection. I used "Cut and Print" option on the Silhouette to cut the circles with the sentiment.
 

Supplies: cardstock (glitter - DCVW, white - Recollections), patterned paper (Heidi Grace), border punch (Fiskars), hearts (Heidi Grace), Silhouette Cameo

The last set features the iris folding technique. I didn't actually fold the strips. The glittery strips of cardstock are too thick to fold but they have a nice crisp edge and look beautiful without folding. I cut the openings with a craft knife, before I had the Silhouette so you can see they are not perfect. I added just few embellishments. I really like this technique and enjoy doing it. Definitely not your "quick and simple" cards but so worth it in my opinion.

Supplies: cardstock (DCVW), wooden accents (Kaiser Crafts), flowers (Heidi Grace), pearls (Kaiser Crafts), raindots (Cloud 9), jewels (Queen and Co), tickets (unknown)


That's it from me. Stop by the Scrap It Girl website to check what other DT members made for this challenge. Of course we would love you to play along. You have till the end of the month to submit your sparkly creation.

Edited to add: I added the picture of the monthly prize to my left side bar. Lots and lots of sparkly goodness: Color Shine, Fine Glitter, Bling slidders, Gelatos, Glitter letters, Bling Flourishes, Sparkler pins. Yum!
Posted by Picasa