Friday, March 29, 2013

Project Life - Week 7

Week 7. Still loving this project. This week I am participating in Michelle's Saturday Project Life Blog Hop. Thanks, Michele for inviting me!

I have two inserts this week. The first has Eli's art work from and the Valentine that he made at school. The second has pictures from the Skate with Heart event.


 Left: left side page
Right: insert #1 (front) with insert #2 and right page picking under

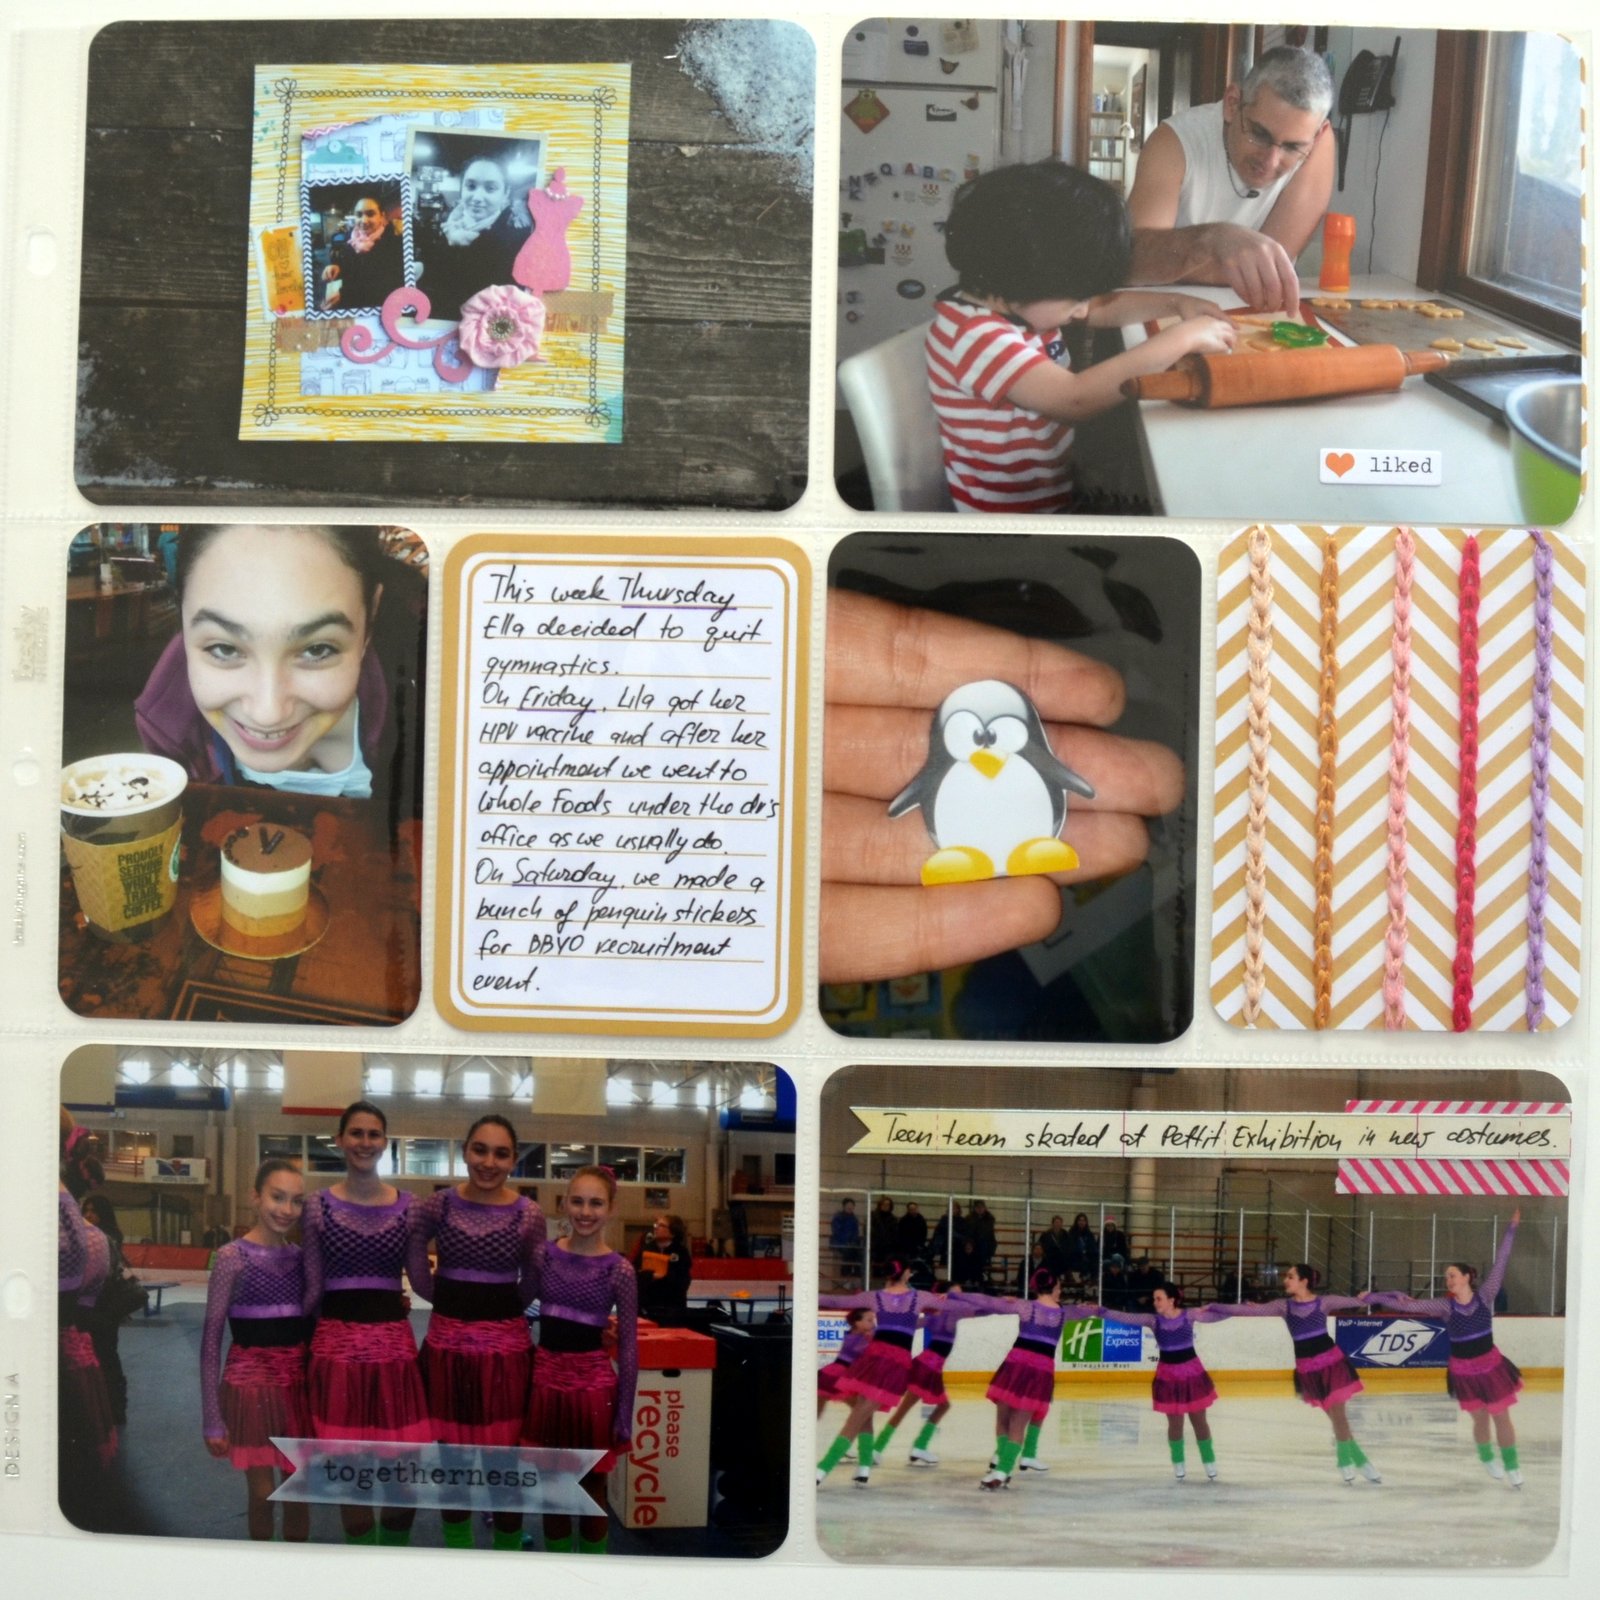
The left page is dedicated to Ella's little "adventure". It took three journaling cards to tell the story. The bottom right pocket has the museum ticket from Ella's school trip. She was invited to join the Fine Arts Pursuit program at our school district. To make the stitching on both cards symmetrical I first poked the holes through the both cards simultaneously. I like how the chevron stitching resonates with the chevron washi tape on the title card.


Left: insert #1 (back) with left page picking under
Right: insert #2 (front) with right page picking under

For the insert #2 I took a piece of 6x12 cardstock and adhered pictures on both sides of the cardstock. I added my half page to the American Crafts 6x12 page protector and just slid the event program together with the page.  I also added a thin piece of glitter cardstock to the slot with the binder holes.

Insert #2

Left: insert #2 (back) with insert #1 (back) and left page picking under
Right: right page

The right side of the layout is full of everyday pictures - cooking, playing, watching movies, cleaning.

I added a picture of the Valentine gift I made for Eli's bus drivers. The "moments" card is by Simple Stories. On Friday night me and Lila watched Brigadoon at her high school. I chose one picture from the drama club facebook page and stapled our ticket stubs to the journaling card.


So here it is. Don't forget to stop by Michelle's blog tomorrow to see the rest of the blog hop!

Tuesday, March 19, 2013

Project Life - Week 6

Week 6 was busy. I ended up adding three inserts to the weekly spread.


Left: page + insert #1 (front)
Right: insert #3 and right page picking under

As always, lots of pictures and some journaling cards to tell the story.
 

Ella had a check up visit. I wrote the story on a folded journaling card and added two pictures inside. They are hidden from a plain view but I know they are there.


We had a snow storm and I snapped few pretty pictures. I found a pretty quote and printed it on a grid card. The blue snowflake is from Doodlebug and I have them for years.


Left: insert #1 (back) with the left page picking under
Right: insert #2 (the roller derby program) with insert #3 and right page picking under

This week my MOMS club had a Valentine party. We spent Thursday making chocolate dipped marshmallow and Valentines. Eli wrote his name and used glue dots to add heart shaped mazes to the cards.
Lila participated in her first roller derby bout and I kept the program and the ticket. I trimmed an 8.5x11 page protector and stitched it on the side to fit the program.

Left: insert #2 (back) with insert #1 and left page picking under
Right: insert #3 (front) with right page picking under

The pictures in the insert #3 are from the Roller Derby bout. I took the pictures in the top left corner and bottom left corner. Other three pictures I downloaded from the Facebook album. They were taken by Nick Collura. I decided not to round the corners of the pictures in this insert. I think they look more athletic in this way :)

I wanted to add a QR code with the video from the bout instead of the speech bubble but I can not make my vimeo video work on a smart phone so that will have to wait.


Left: insert #3 (back) with left page picking under
Right: right page

The derby was on Saturday and on Sunday the parents were invited to watch the practice. The pictures on the back side of insert #3 are from the practice. I used gold Colorbok stickers on the front and the back side of this insert.

The right page of the layout has random pictures from the rest of the week and one journaling card. I also included the "chalk" artwork I made for Eli's preschool. It was my first time doing anything like that and I was super happy how it turned out.


I am linking up with Project Life Tuesday over at the Mom Creative.

Project Life is a memory keeping system designed by Becky Higgins.

Wednesday, March 13, 2013

Samantha Walker Creative Team March Blog Hop


Welcome to the Samantha Walker Creative Team Blog Hop! This month's theme is Easter or Lucky/St. Patrick's Day!
You should have arrived here from Susie's blog.
 
If this is your first stop, be sure to head over to Samantha Walker's blog to start at the beginning!
This month one lucky winner will receive  French Frills Spellbinder Set! (Isn't it lovely??)

AND be sure to look extra closely at Step #4 to learn how you can get this FREE SVG and Silhouette Studio file:

To enter, just leave a comment on  Samantha's blog  by Sunday, 03/17 at 11:59pm MDT. The winner will be announced on Samantha's Facebook page on Monday, 03/18.

For additional entries:
1. Receive an additional entry for commenting on each of the other blogs in the blog hop.
2. Go here and follow Samantha Walker's blog 
3. Follow her on Facebook

4. Sign up for an e-mail subscription to Samantha's blog and you will automatically receive a link to a free SVG cutting file that you can download and use on your personal electronic cutter. If you are already a subscriber, just enter in your information in the secure form on Samantha's blog!  The free files will be e-mailed early next week!

To receive the additional entries and get the free files, mention in your comment on Samantha's blog that you have done so! 

And now let me show you what I made!

I decided to go with the theme "lucky" and picked this cute picture of my son Eli from last spring. I layered strips of patterned paper from Samantha Walker Traditions collection and some green cardstock under the picture and stitched the edges. I chose mainly green papers with small accents of blue, red and orange to go with the theme. 


After the stitching part was done I simply run my nails along the edges of the paper strips to give them more dimensional and distressed look.


I wanted to make a base for the title so I stitched a piece of vellum on top of the paper strips. The vellum muted the colors of the paper and helped the title to stand out. 


To make things a little more interesting I cut tens of clovers in two different sizes and two colors and added them under the vellum. If you look closely you will see them picking out under the title. I made the clover cut by using the free shape of the month and deleting everything except the clover.

The title is another cut file by Samantha Walker. 

This time I cut the shape as is and used sharp scissors to cut of the "S". I layered green glitter clover on top of the clover that is part of the shape.


I finished my layout with few coordinating tags, stickers and more lucky clovers.

Thanks so much for stopping by!  I hope you were inspired to try these or any other beautiful cut files from Samantha Walker Silhouette Store.
Click on the image below to head over to Claudia Harvey!

Tuesday, March 12, 2013

Banner card set


 Supplies: cardstock (American Crafts), patterned paper (Samantha Walker for Carta Bella), stamp (Samantha Walker for JustRite), glitter (CTMH)

I am up today on Samantha Walker blog! I made a simple card set using Samantha's Bunting Border cut file, Buntings and Banners stamp set and Samantha Walker Traditions collection from Carta Bella.

These papers are so thick and give such a nice rich feel. I loved working with them and I already made another layout that I will share tomorrow.

I made a little paper band to hold the card set together. Stop by the Samantha Walker blog for the tutorial and more details.

Come back tomorrow for Samantha Walker Creative Team Blog Hop. As always, you can get a free cut file and have a chance to win an awesome prize.

Saturday, March 9, 2013

Virtual hugs


Two layouts based on the sketches from My Scrap & More blog.

Supplies: cardstock (unknown), patterned paper, chipboard buttons, twine (My Mind's Eye), washi tape (Recollections), wood veneer bird (Recollections),  raindots (Cloud 9), distress ink (Tim Holtz)

I had to scrap this cool picture of my dear friend Nina. I so wish we would live closer and I could give her a hug more often than once in every few years. This layout is my virtual hug.

I cut out small doilies from the patterned paper and layered them with threaded chipboard buttons.

The piece of  chipboard with "Follow Your Heart" banner on top and scroll edge on the bottom was part of the packaging. I liked how it looks, layered under the picture and wrapped with twine.


The second layout is about another person I didn't see for very long time - my cousin Miri. She is holding her brand new baby girl that I never saw. So here is another virtual hug to my beautiful cousin and her sweet bundle of joy.

Supplies: patterned paper, stickers (Echo Park), stamp (Studio Calico), epoxy hearts (Heidi Grace), chipboard sticker (Bo Bunny)
Almost everything here is from the "Everyday Eclectic" collection by Echo Park.

Love the shape of these hearts by Heidi Grace. I used my new roller stamp by Studio Calico.

More fussy cutting and layering. 

If you like sketches (and who doesn't??) you should join the My Scraps & More sketch-a-thon! They have new sketch every day in March! Fun!


Tuesday, March 5, 2013

Project Life - Week 5


Catching up on Project Life. No inserts this week.

Left page: pictures of Eli from the open gym (4x6 collage made in Picasa), 2 pictures of Eli signing, dancing and goofing while we waited for Ella to finish her gymnastics class, picture of me and Eli that Lila took, picture I snapped when picking up the girls from the middle school forensics practice, snipped from the newspaper about our crazy weather.

Right page: picture of the first layout I made in 2013, Eli and Ofir making cookies, Lila at Whole Foods after the dr's appointment, penguin stickers I made for BBYO event with my Silhouette, two pictures from the ice skating exhibition.

This was the week the crossed two months. I decided to cut the outgoing month smaller and add it in the upper left corner. I like how it turned out and will continue to use the same design through the year.

I added some hand stitching to the filler card. It only took me an hour and a half :) 
Weeks 6 and 7 are almost done - the pictures are in the page protectors already. Hope to finish them this week.

I am linking up with Project Life Tuesday over at the Mom Creative.

Project Life is a memory keeping system designed by Becky Higgins.

Friday, March 1, 2013

Caught on film - Scrap It Girl challenge


Hello March. Hello longer days. Hello anticipation of coming spring. Hello new Scrap It Girl challenge.


Supplies: cardstock (blue - American Crafts, brown and yellow - unknown), patterned paper (Amy Tangerine for AC), squeeze punches (Fiskars), circle labels (Jenni Bowlin), film ribbon (Tim Holtz), letter stickers (Simple Stories), transparent tag (Basic Grey), stamp (K&Co), Silhouette Cameo, staples

This one is a recipe challenge: 1 stamp, 2 kinds of punches, 3 patterned papers.
1 stamp - SMASH roller date stamp - check
2 kinds of punches - small heart and file tabs (both Fiskars squeeze punches) - check
3 patterned papers - cameras paper for the mat, aqua paper for file tabs, lined paper for the journaling and the title - check
Pictures of Eli putting his shoes on by himself (gasp) - check

I cut the title with Silhouette Cameo by typing the title in Marketing Script and than welding it.


Believe me, this unusual event deserved a layout. When I saw him reaching for his shoes and putting them on I grabbed my phone and started snapping. Now I have a proof :) He can do it!


Stop by the blog to see what other DT members made for the challenge. You have till the end of this month to submit your entry. You could win a fantastic prize  - see picture on my left side bar.